Archaeological Ceramic
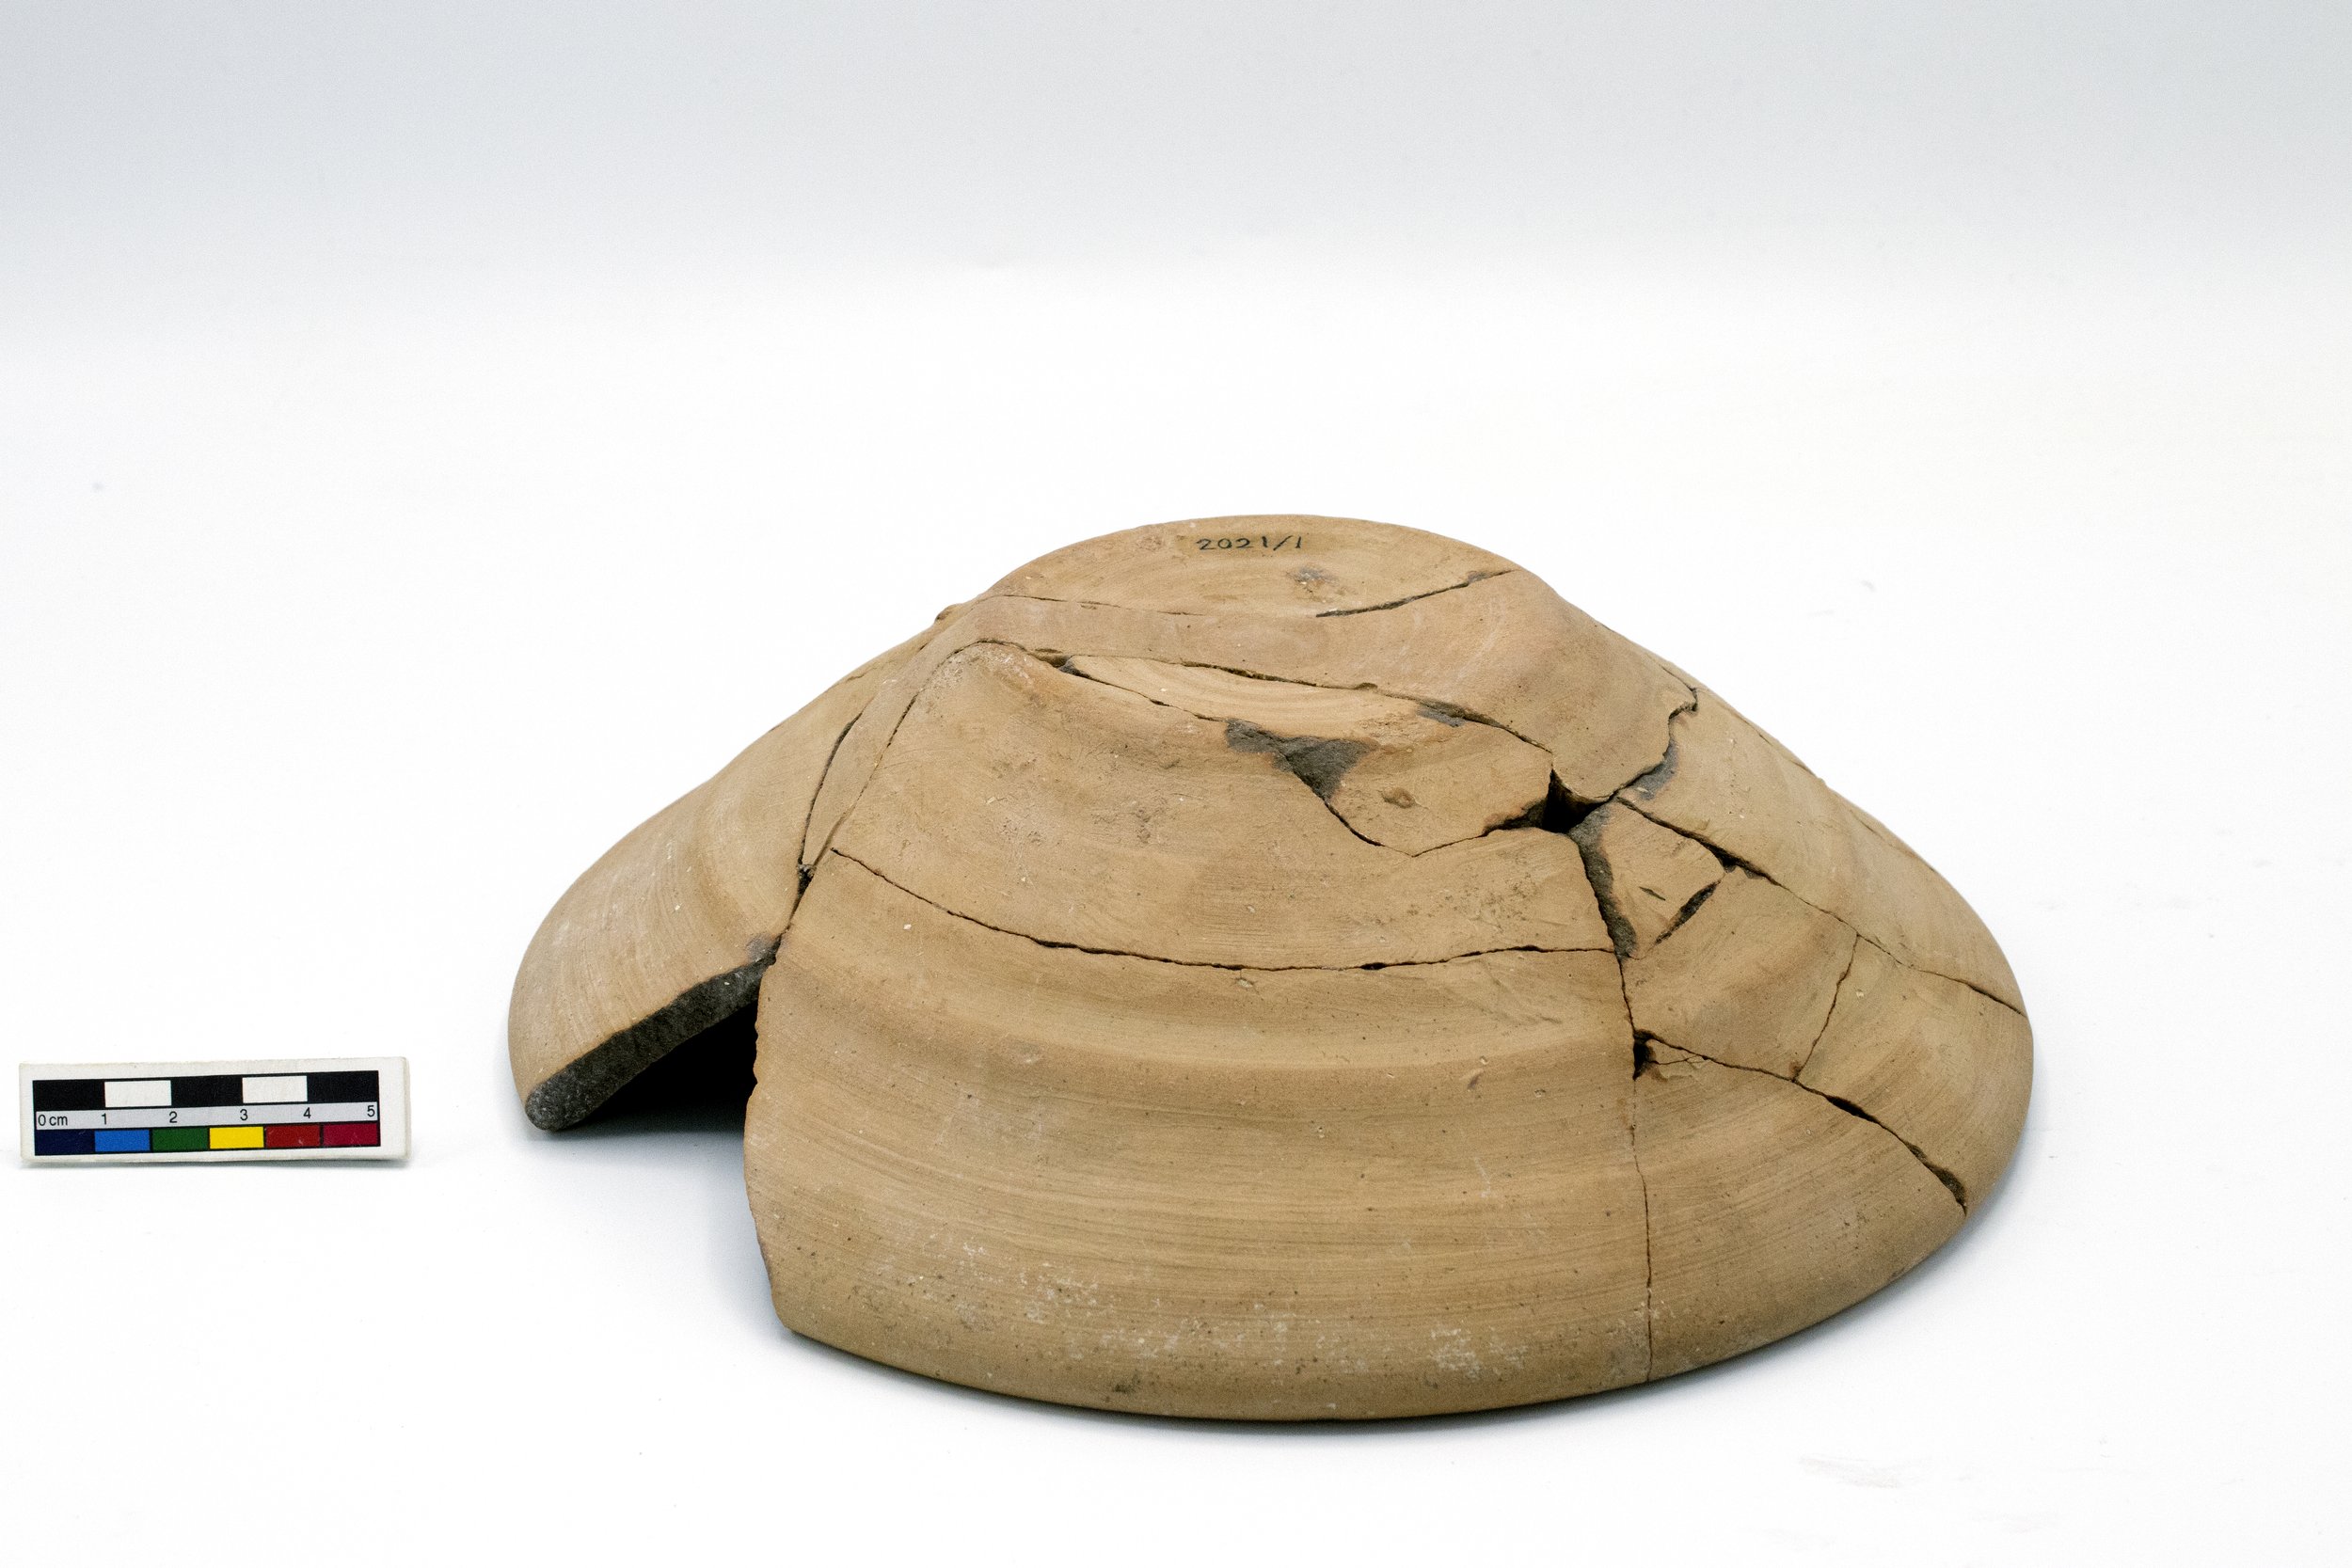
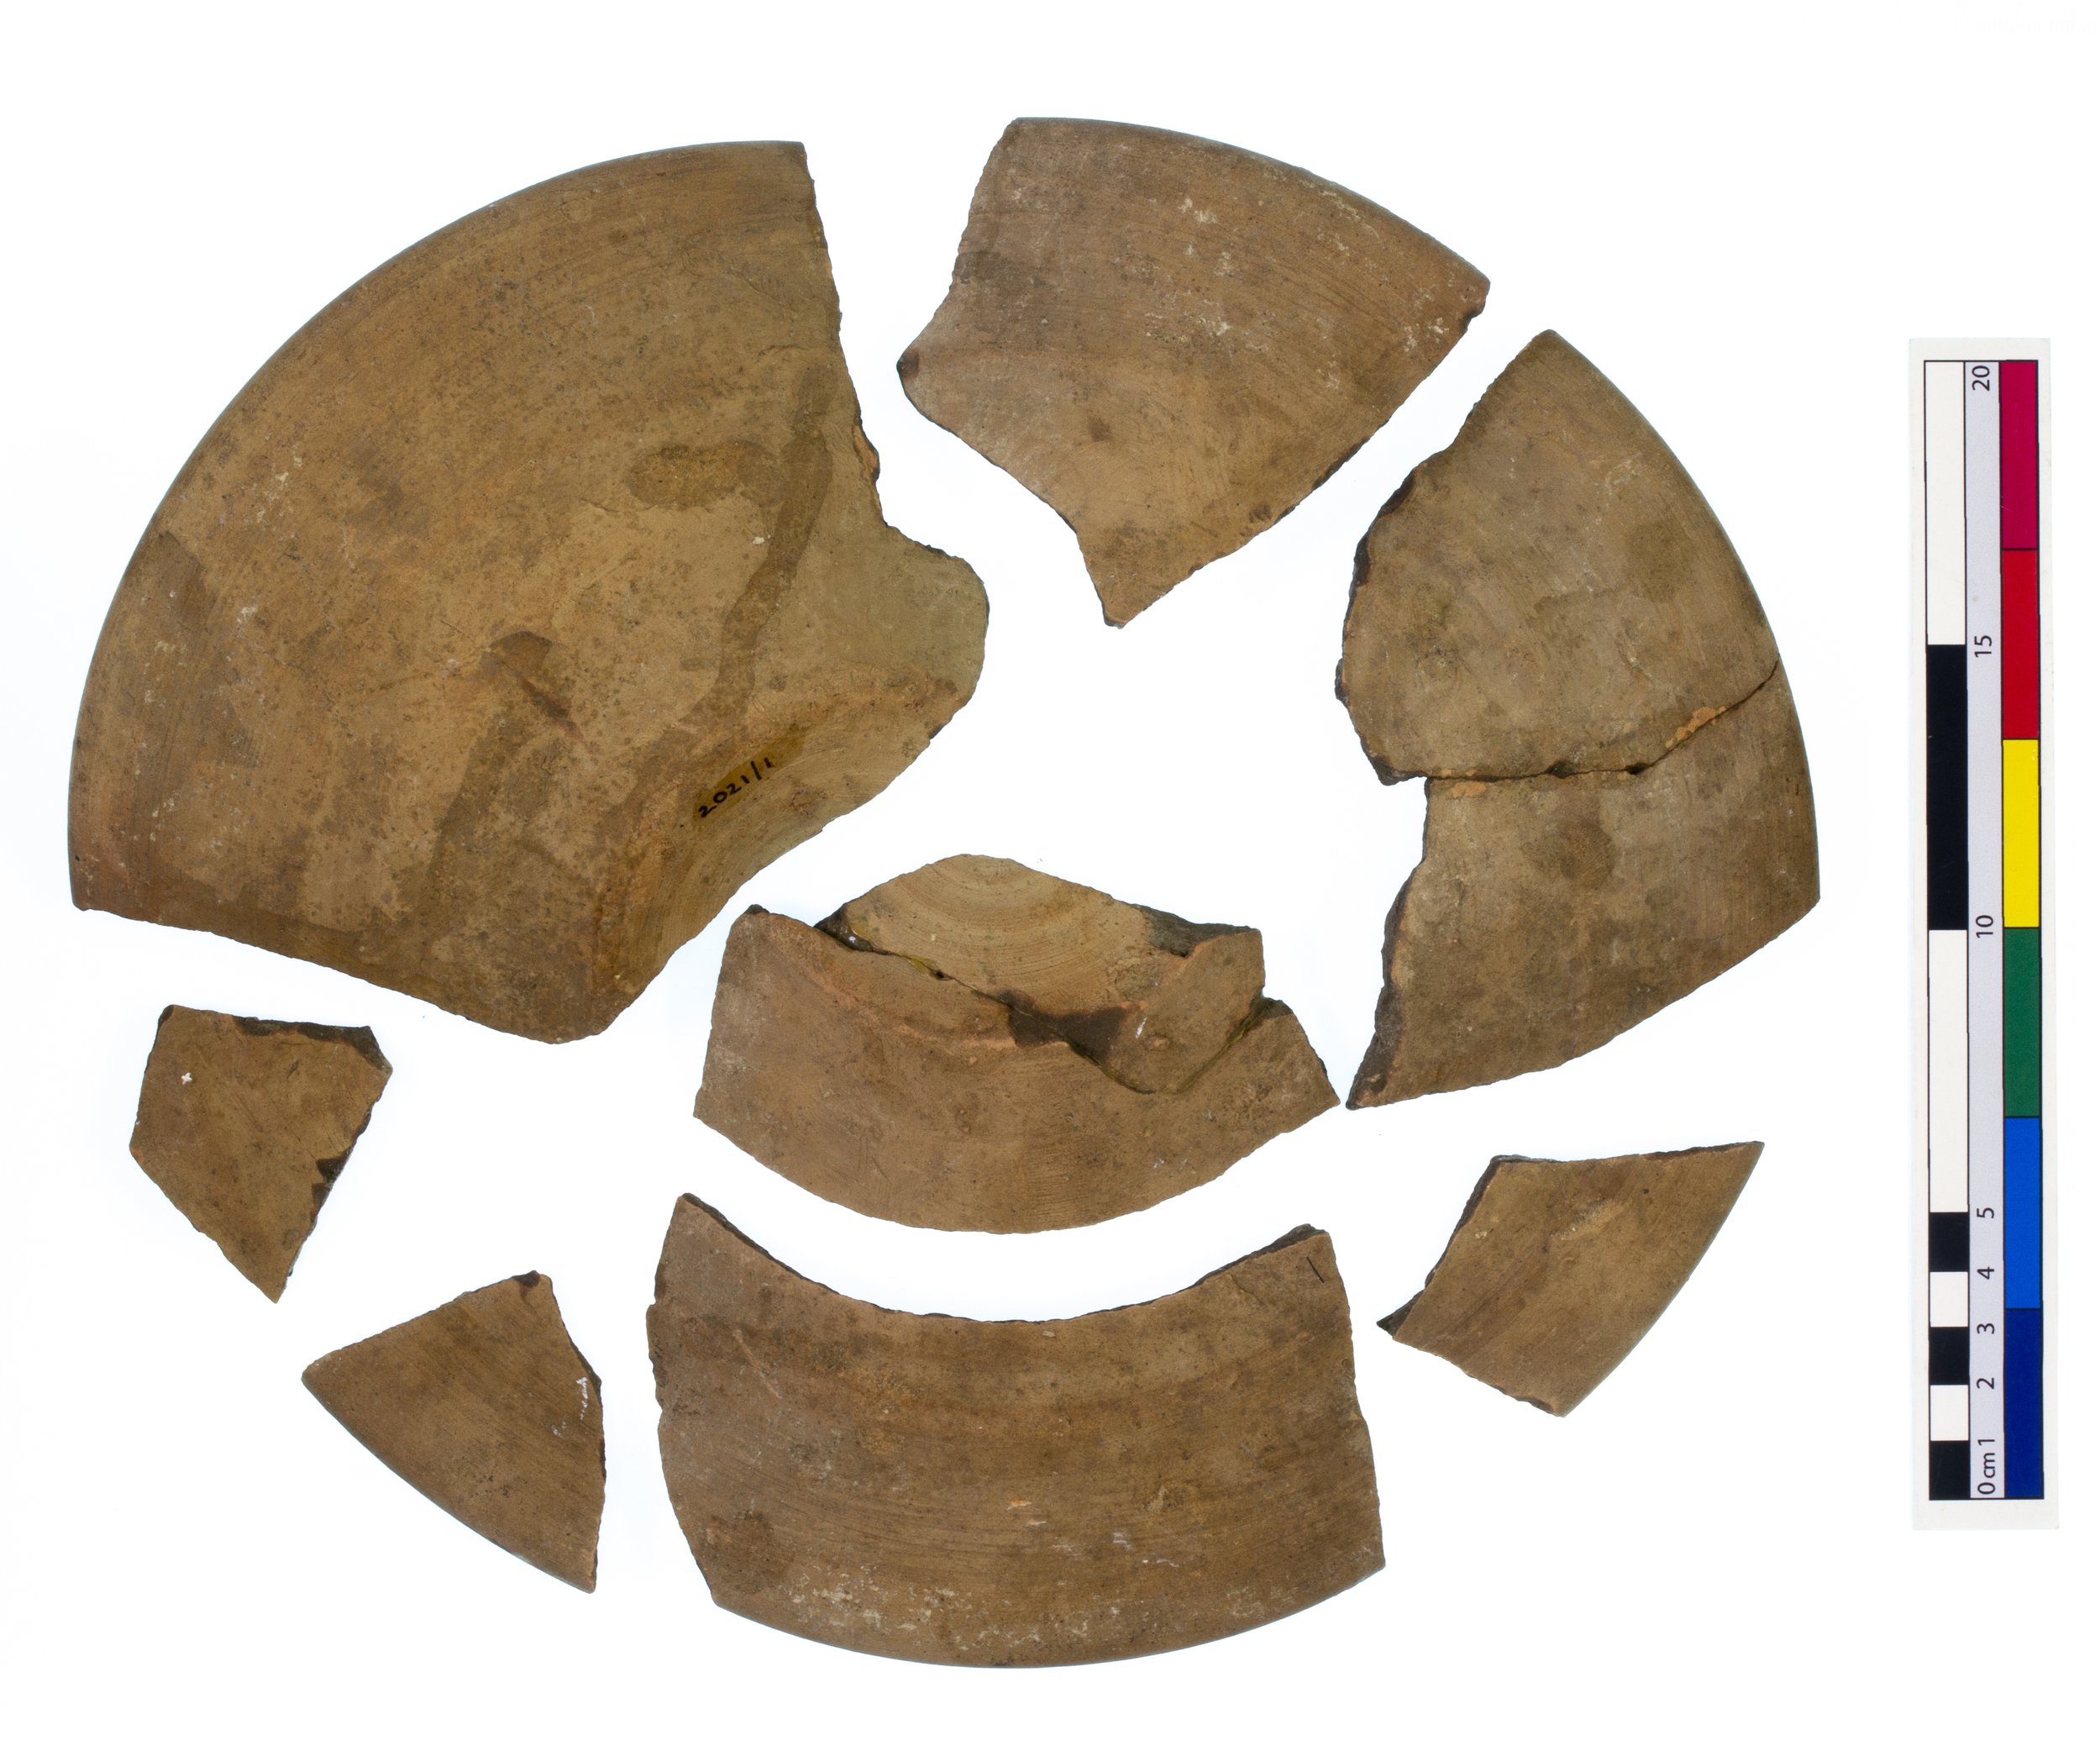
This archeological ceramic arrived from the Institute of Archaeology in pieces and, unfortunately, dissociated from its history and provenance. Though it is understood to be a Bronze or Iron Age ceramic from Sir Flinders Petrie’s excavations in Palestine, little else is known about its origins. In order to be useful in the Teaching Collection, the vessel needed reconstruction using the addition of structural fills. Its surface was soiled with dust and conservation materials from previous repairs.

Cleaning
Dry cleaning
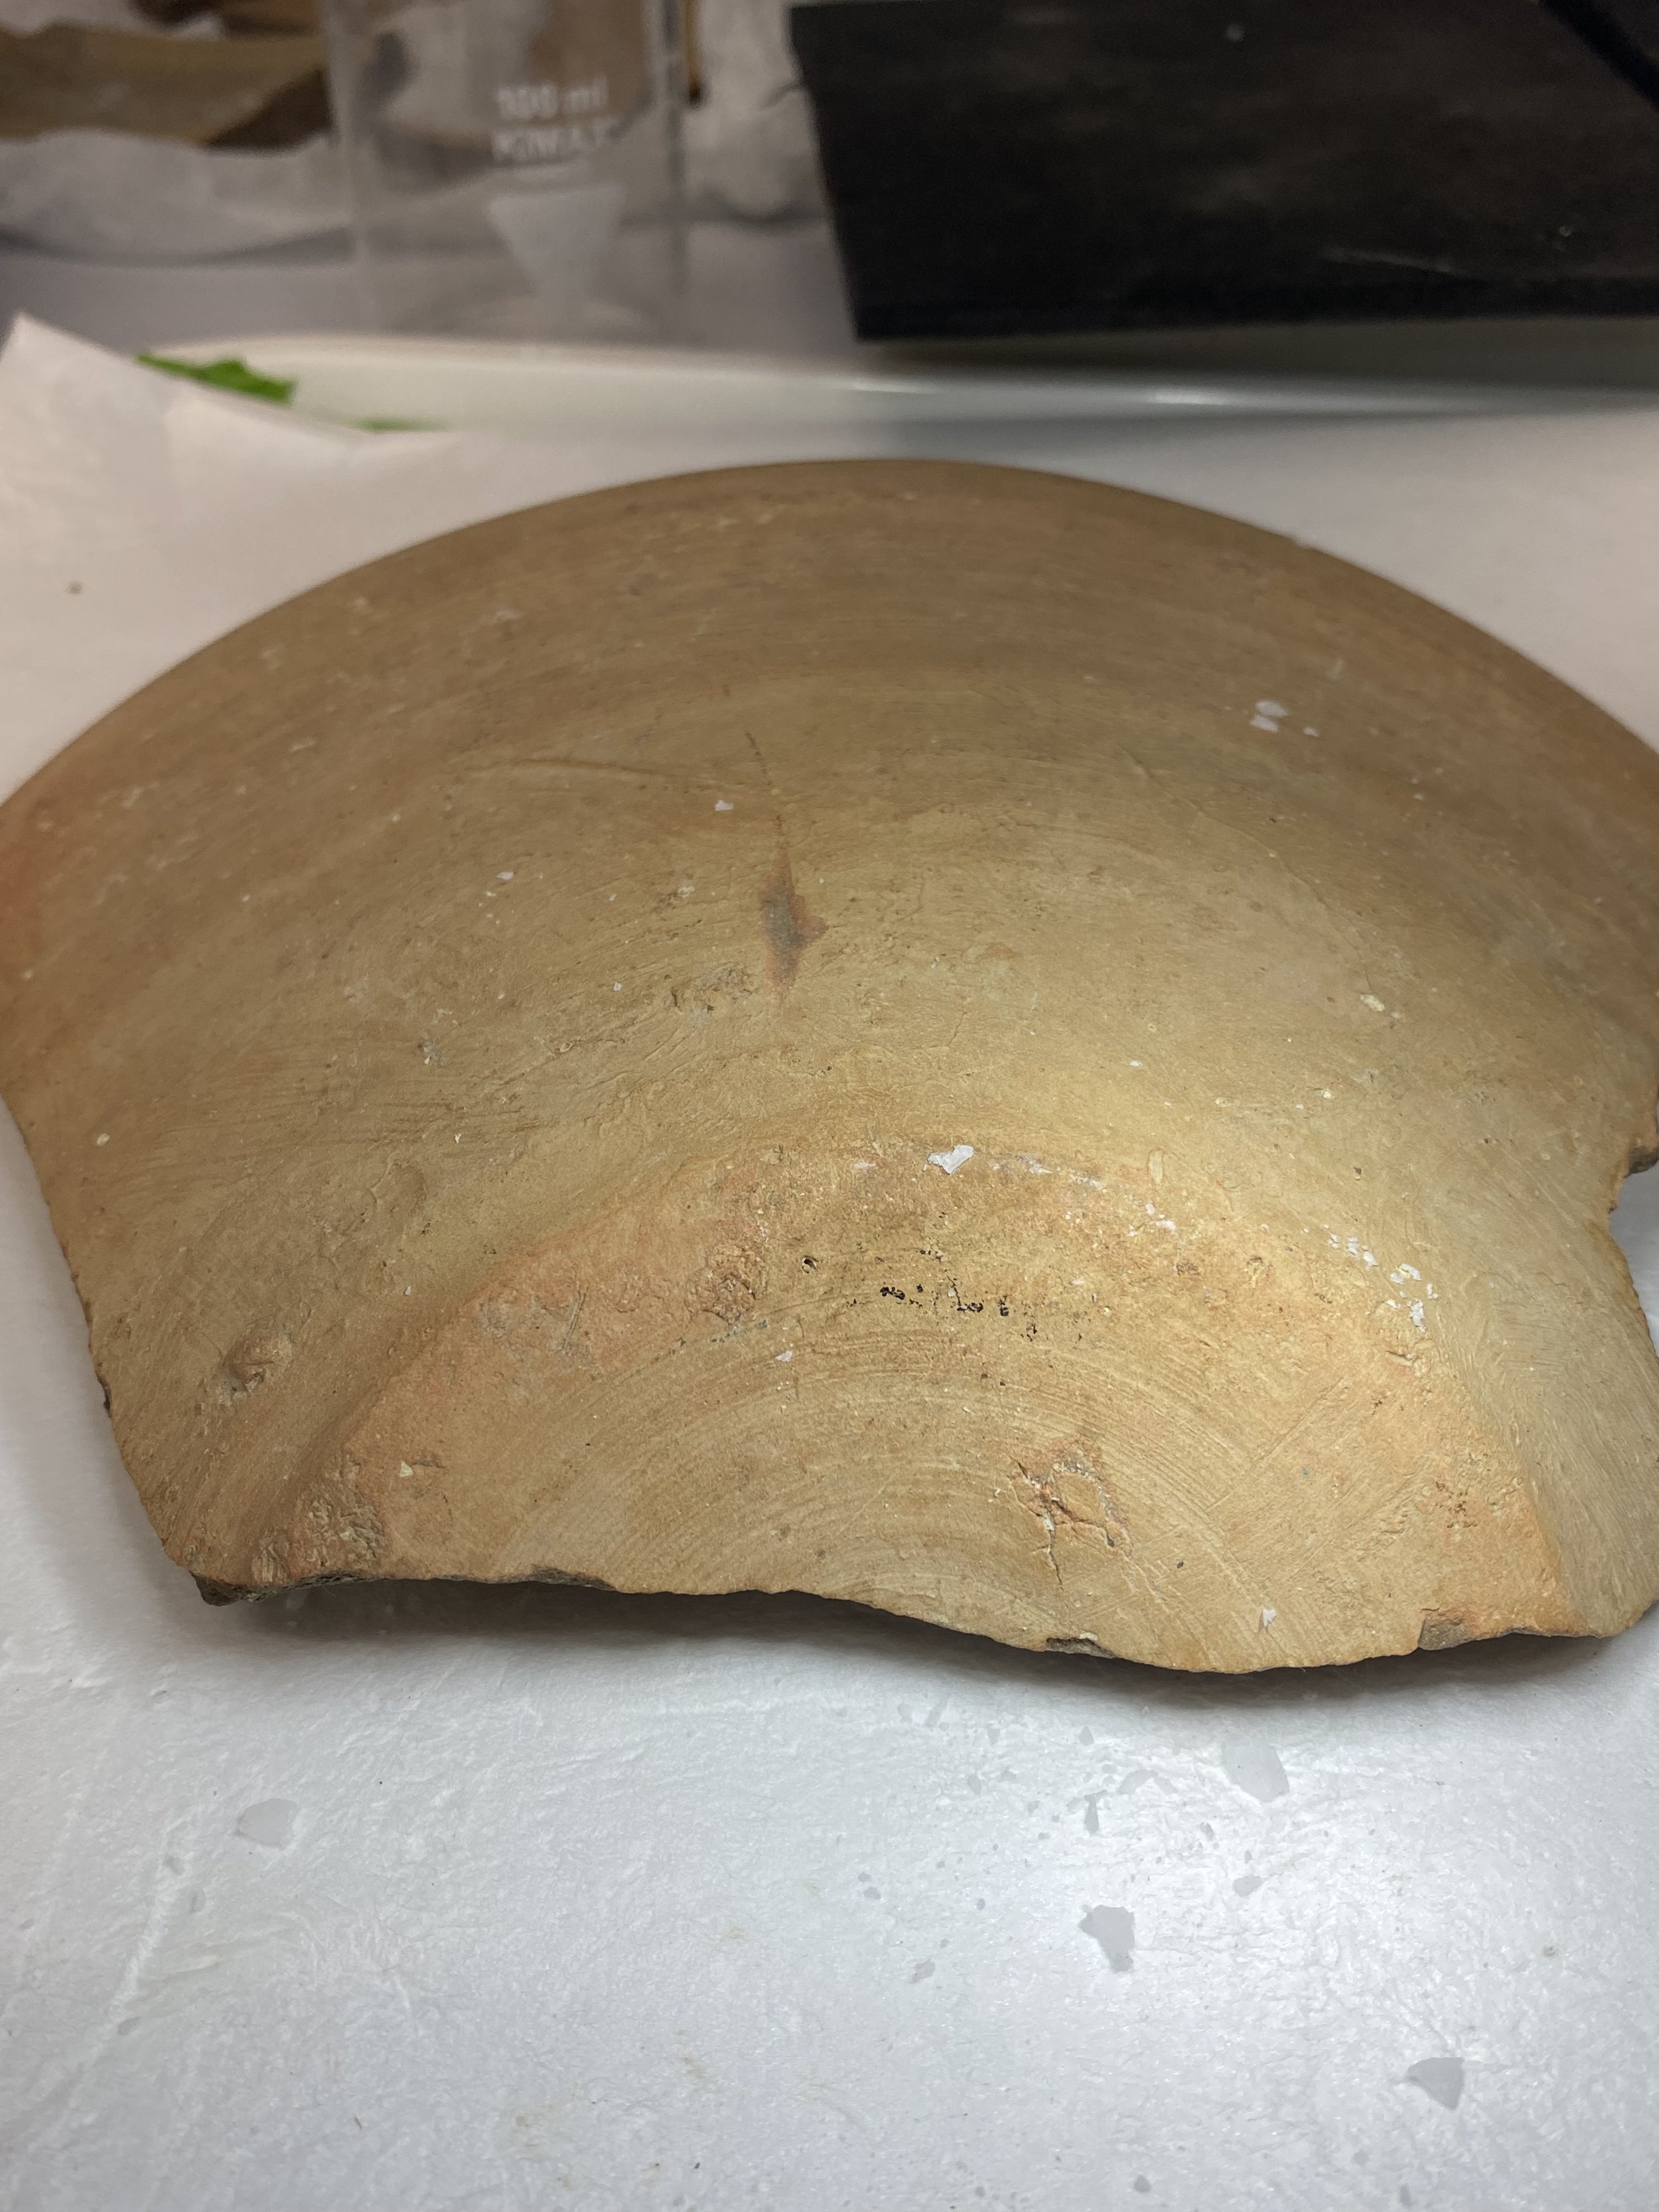
Dry cleaning was conducted with an initial clean using a goat hair hake brush to release any debris. The surface was then cleaned twice with Smoke Sponge (vulcanized natural rubber). Care was taken not to disturb the markings inside the bowl.
--- Consolidation was applied at this point, details of which can be found in “Stabilisation”.
Wet cleaning
The surface was cleaned used acetone on cotton wool swabs. Although initial spot testing showed the adhesive along a join responded well to acetone, this was not the case for soiling on the surface. The use of acetone removed mostly dust and light surface dirt.
Because the majority of adhesive was later identified to be animal glue, hot deionised water was successfully used to clean the surface as well as take down joins.
Deconstruction
Given the stubbornness of the surface soiling, it was deemed appropriate to begin the solvent atmosphere and recommence the surface cleaning after the sherds were separated. So, the bowl was placed in a Stewart box (polypropylene) lined with acid-free tissue along with 100 ml of acetone with a tuft of cotton wool in a glass beaker.
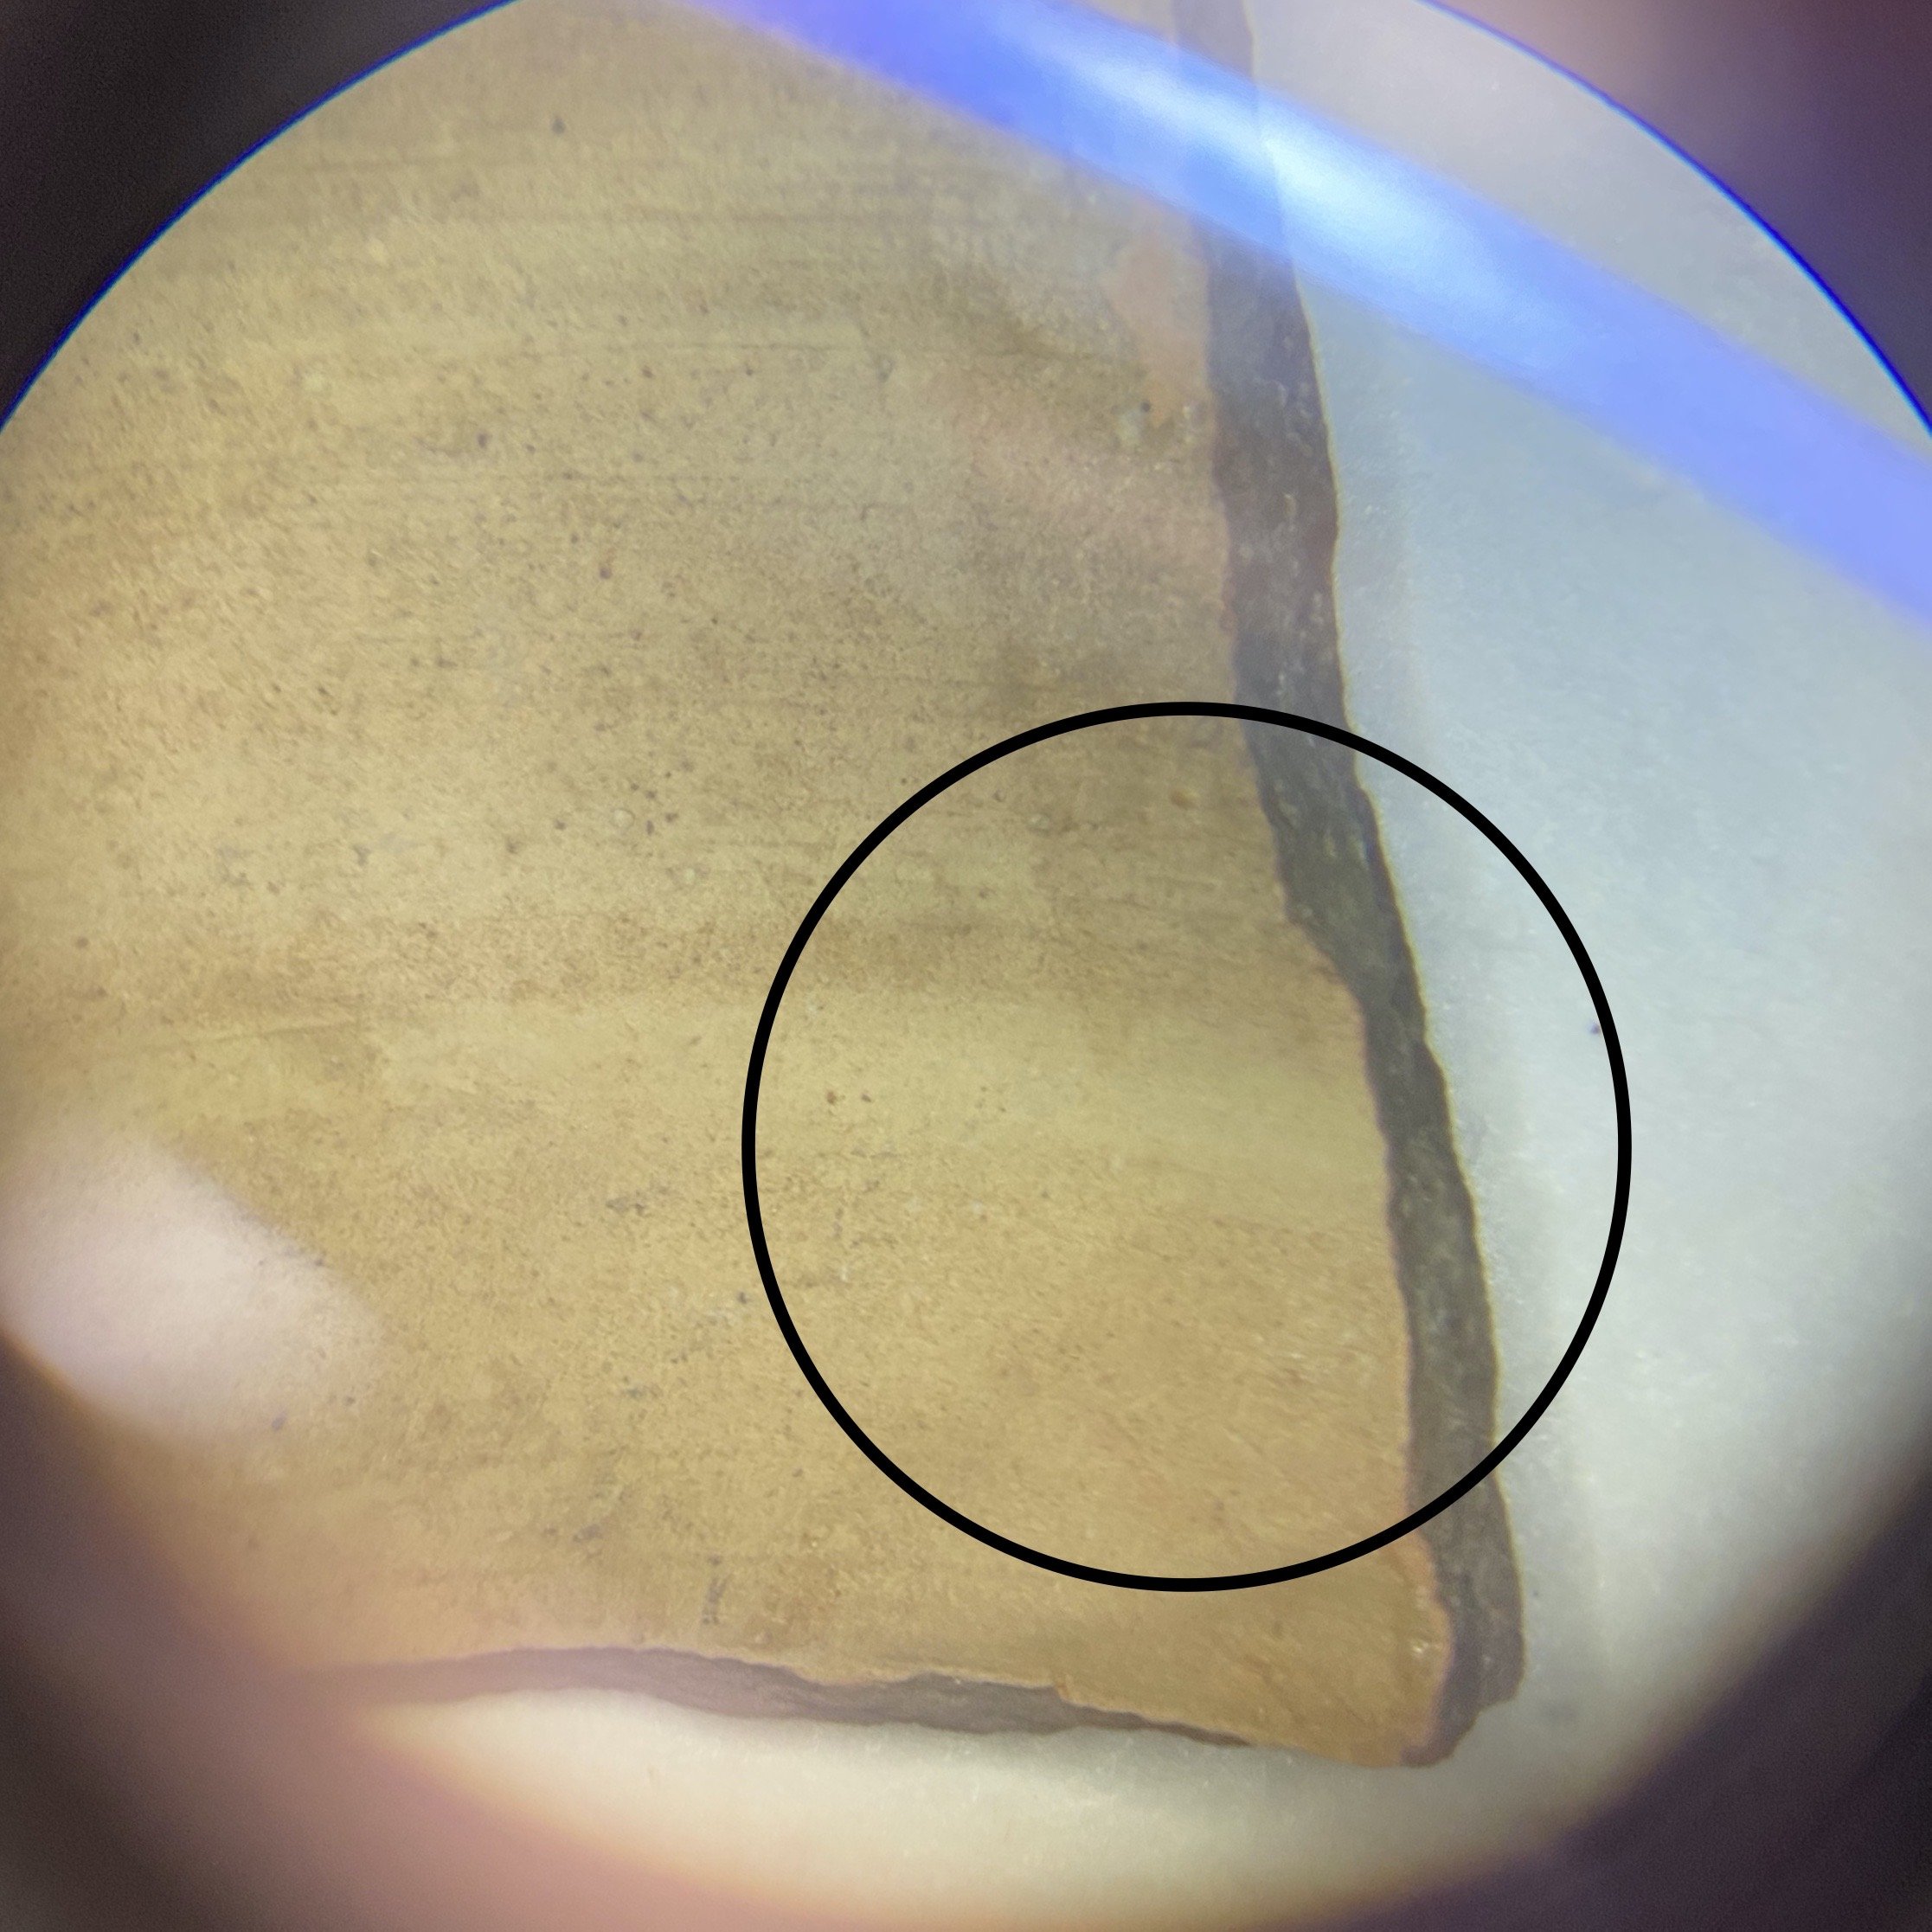
After 24 hours, two of the joins (the tightest and probably most recent) came down and were easily cleaned with acetone on cotton swabs under a microscope. When the join on the smallest fragment came down, a few small fragments along the break edge became loose and were bagged and labelled.
The remaining joins were left in the solvent atmosphere for four days and observed. There was no change.
Because of the successful deconstruction of the first two joins, the solvent atmosphere was left to work for a longer period of time, about two weeks, while checking regularly for signs of change before introducing a new solvent. When this was unsuccessful, it became necessary to move on to other options.
This lengthy solvent atmosphere also resulted in the loss of the IoA label at the base of the bowl.
Cotton wool was rolled into a strip, soaked with acetone, and applied directly to one of the joins. This wetting did seem to make the adhesive a bit looser, some of which was able to be cleaned with bamboo skewers or a #15 scalpel under a microscope but it was obviously not the most effective solvent.
It was then suggested that the most likely adhesive on the remaining joins was probably animal glue. Although the spot tests showed no sign of change with deionised water, those tests were conducted with room temperature water. The spot test was repeated with boiling deionised water which immediately solubilised the remaining adhesive both on the joins and the ceramic surface.
The joins and ceramic surface were then cleaned with the application of boiling deionised water on cotton wool covered with aluminium foil. The water was left to soften the adhesive for a few minutes and then the join was cleaned under microscopic light with bamboo skewers, #15 scalpels, and soft-bristle (nylon) toothbrushes.
Step 9 was repeated twice more along the joins and surface and a fourth time on the ceramic surface alone to encourage a homogenous finish.
Once all shards and fills were adhered in place, joins were tidied using acetone on cotton swabs, a #15 scalpel, and stainless steel tweezers.

Stabilisation
Given the presence of markings inside the bowl and an IoA label on the base, consolidation of all markings was necessary before the bowl could be placed in a solvent atmosphere.
Consolidation was done with the application of 40% w/v cyclododecane (cyclic alkane) in white spirit (applied in the fume cupboard). Then multiple layers of cyclododecane were applied using a heated spatula with an attachment for warming solids.
Reconstruction
After cleaning, the bowl was left to dry in the fume cupboard so that a dry reconstruction could conducted with masking tape (saturated paper with acrylic adhesive) and FrogTape® Delicate Surface Painter’s Tape (saturated paper with proprietary acrylic adhesive) to determine the shape of the structural loss.
The fragments were weighted and, at first, thought to be retaining a significant amount of water. Upon checking treatment notes, it was clear that one fragment had been incorrectly weighed as the weight for all other fragments was back to the pre-treatment levels. It was then determined the sherds were dry and reconstruction could begin.
Fragments were joined using 50% w/v Paraloid B-72 (ethylmethacrylate copolymer) in acetone applied with a size 6 synthetic paint brush damped with acetone. The fragments were joined in two halves so that the structural fill, which needed to cross the entire base, could be removed after setting. While curing, joins were supported using FrogTape® Delicate Surface Painter’s Tape.
Once the structural fill was ready, it was adhered in place with 50% w/v Paraloid B-72 in acetone and the other half of the bowl joined to the first. The joins were supported with FrogTape® Delicate Surface Painter’s Tape and left overnight to fully cure before the tape was removed.
Loss Compensation
While the bowl was still in two halves, they were joined with FrogTape® Delicate Surface Painter’s Tape so that dental wax (usually composed of beeswax) could be softened with hot air and formed over the base and inside of the bowl.
The edges of the loss area were then protected with pieces of Parafilm (blend of waxes and polyolefins), pulled tight and adhered with FrogTape® Delicate Surface Painter’s Tape. Due to the angle of the pour, it was necessary to also protect the surface of the bowl, so additional Parafilm covered the rest of the bowl.
The dental wax moulds were then placed over the loss area and secured with tape.
Tiranti Basic Alpha Plaster (calcium sulphate hemihydrate) was mixed in a silicone bowl and poured into the loss area from the base. Because of the shape of the fill, it was difficult to get the plaster to reach the far corners and the resulting fill was ineffective.
Steps 1- 3 were repeated to prepare for another fill to be made. When it came to repeating Step 4, a few adjustments were made to increase the likelihood of a successful fill: plaster was made with a more runny consistency so that it could reach the far corners, it was injected with a large plastic syringe (polypropylene or polyethylene) with the tip cut off so that the flow of plaster could be better controlled, and, lastly, the plaster was injected first in one half of the cavity, allowed to become firm, and then repeated in the other half.
A fill was also made for the rim, though this was deemed not a priority because it was not a structural necessity.
The plaster was allowed to set overnight and then removed from the bowl the next day. At this point, the fill was in two halves and had a hole in the middle where the plaster was poured.
To address the hole in the fill Steps 1 – 4 were repeated again, with just a small amount of plaster needed to fill the final area.
Upon removing the fill from the bowl, the smaller corner broke off, revealing there was a large bubble in the plaster. A bit more plaster was used to fill the bubble. At this point, the fill was in two parts, but still fit the loss area and was not distracting from the overall object.
300 grade sandpaper (paper lined with aluminium oxide) was used to file down the edges of the fill for a cleaner shape.
Dry pigments, including Fuller’s earth, vermilion tint, burnt sienna, raw umber, titanium white, chrome yellow, and yellow ochre were mixed with 5% w/v Paraloid B-72 in acetone and applied with a makeup sponge (hydrophilic polyurethane) pre-wet with acetone. Colour was built up in many layers to achieve a non-homogenous appearance.
In order to recreate some of the striation, pigments in 5% Paraloid B-72 were applied with an almost dry paint brush gently dragged over the surface.
Once completed and adhered into place, it became clear the the fill, while decent in colour-match, was too big for the area. It hanged slightly over the edge on the inside of the bowl and cast a shadow which brought more attention to the discrepancy. To address this, it was decided that the fill had to be filed down. Initially this was avoided because the fill had recreated some of the great striation in the bowl, but the size was ultimately too distracted.
Because the fill was already adhered, a heat gun was used to soften the adhesive around the fill so that it could be pushed out, aligning the inner lip of the fill with the ceramic body. This meant that the fill now extended out the back of the bowl.
To reduce the size of the fill, it was first lined with polythene sheeting and taped with FrogTape® Delicate Surface Painter’s Tape around the edges (face down). Then a Dremel with a sanding drum attachment was used to shape the edges of the fill so that there was no harsh edge between the fill and the ceramic body.
After the sanding was done, the fill was gently brushed with a soft-bristle toothbrush and polythene sheeting removed.
Steps 10 and 11 were then repeated.
Because the IoA label was lost during the solvent atmosphere, it was reapplied in the same position using three layers of 30% w/v Paraloid B-72 in acetone on a #2 sable brush, text was written on with a fine-tip permanent marker in black, and then coated with another layer of Paraloid B-72.
Although the overall finish of the bowl was improved, there were still two lips along the edges of the fill on the inside of the vessel which created shadow and increased the visibility of the fill. In order to reduce this, Step 13 was repeated on the inside of the vessel.
Because this necessitated some repainting, the opportunity was taken to also thoroughly clean the joins using acetone, cotton swabs, and a #15 scalpel before Steps 10 and 11 were repeated.